Integration
Shopify
Integration
Transform your clothing store into a personalized fitting room. Setup takes minutes. No complicated development required.
SIMPLE PRICING: 1 CREDIT = 1 VIRTUAL TRY-ON
Setup Guide
Step 01
Install Fitora AI
Add Fitora AI to your store from the Shopify App Store. You'll be asked to authorize standard permissions to allow the app to modify your theme and access products.
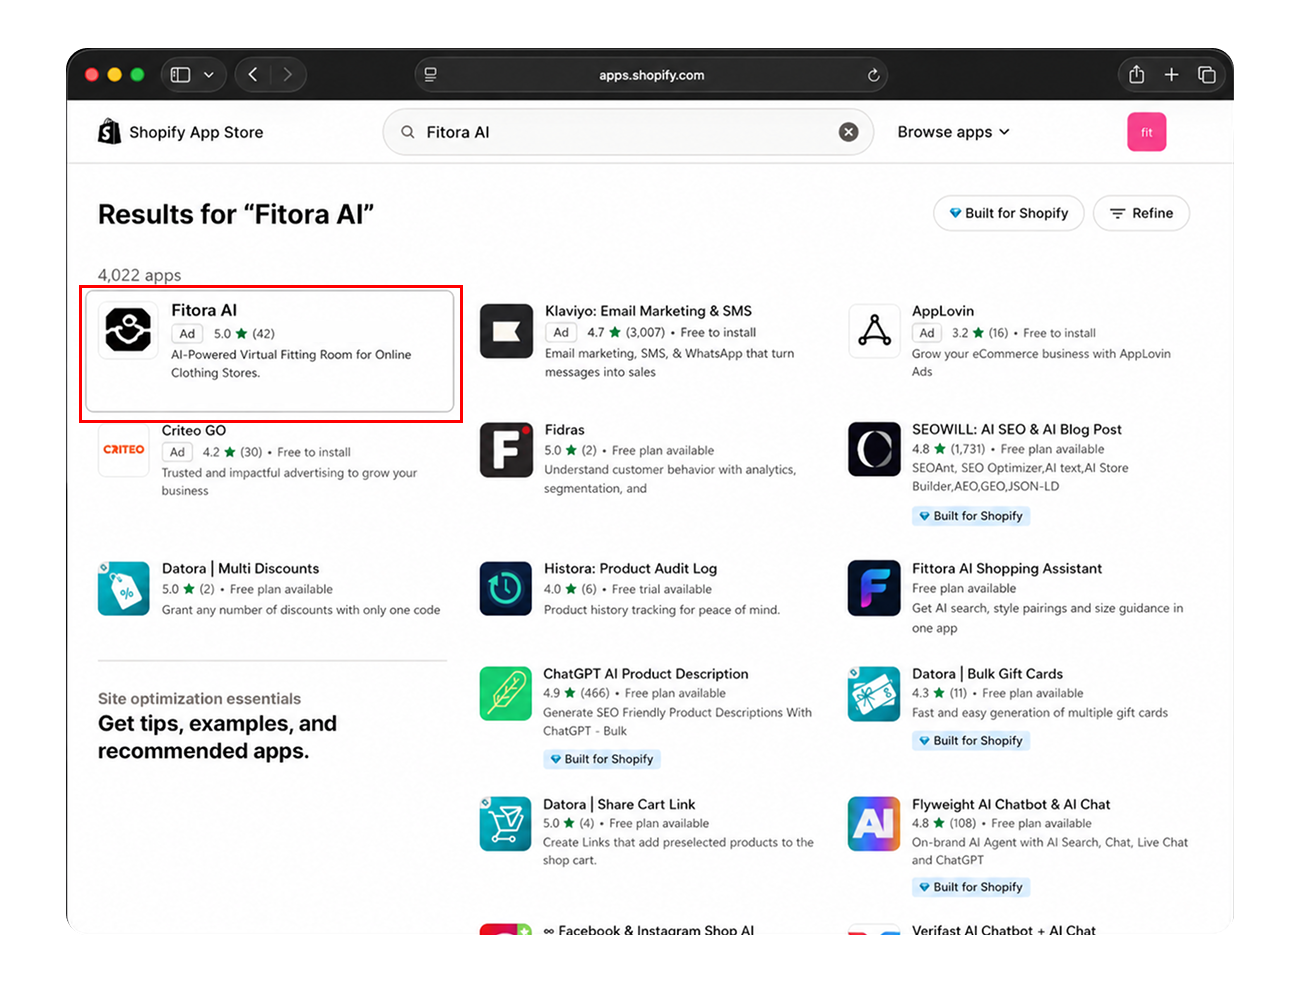
Look for: The Add app or Install app button in the Shopify App Store.
Step 02
Connect Your Account
Once installed, open Fitora AI from your Shopify Apps menu. You will need to link your Shopify store to your Fitora AI account using an API Key.
1. Get your API Key from the Dashboard
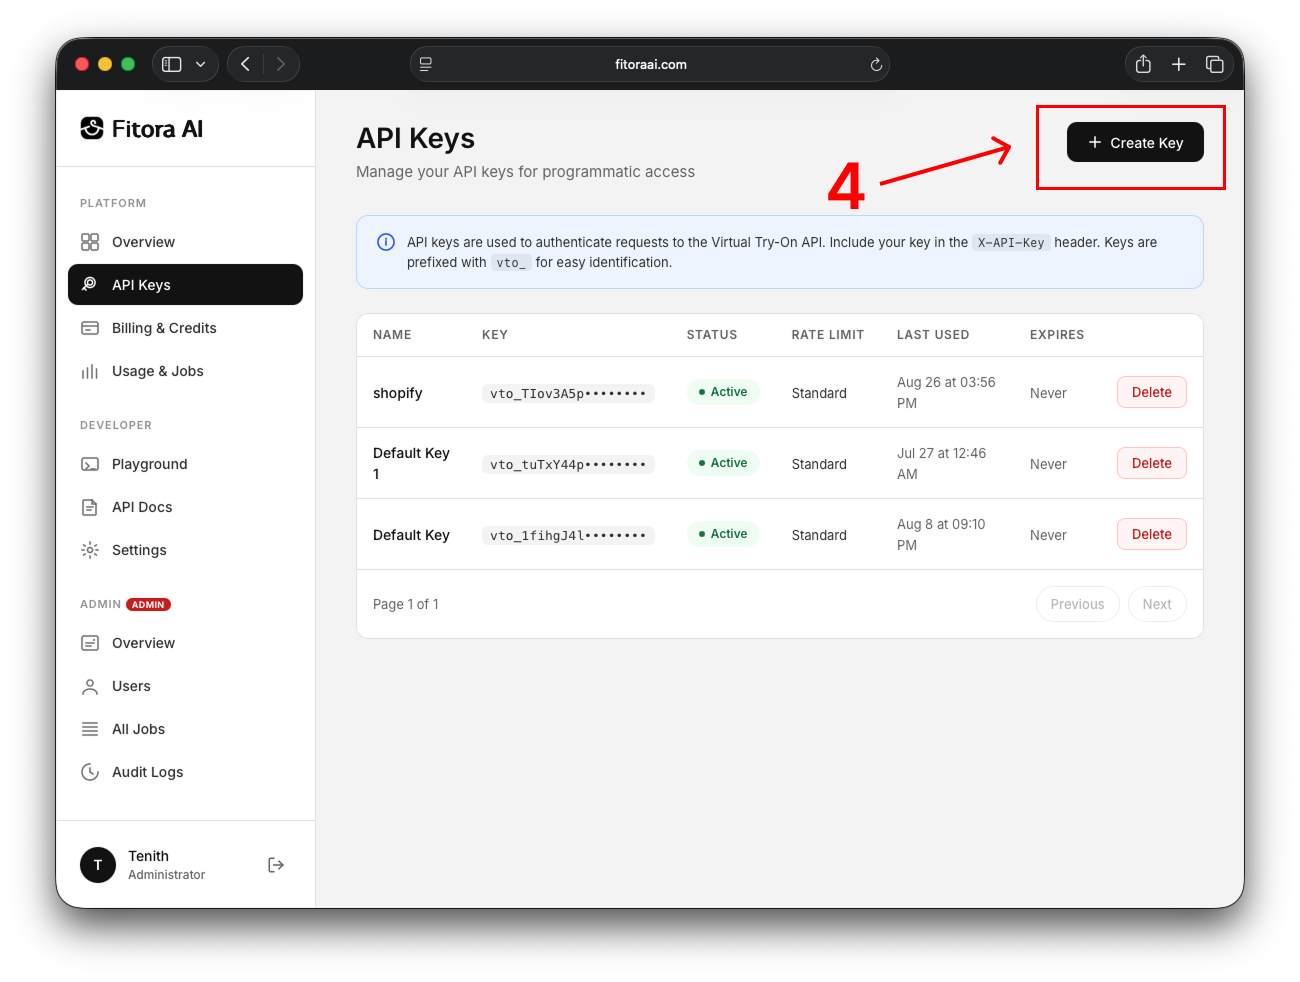
Look for: Create API Key in your Fitora AI Dashboard under Settings. Ensure you copy the key starting with vto_.
2. Connect in Shopify
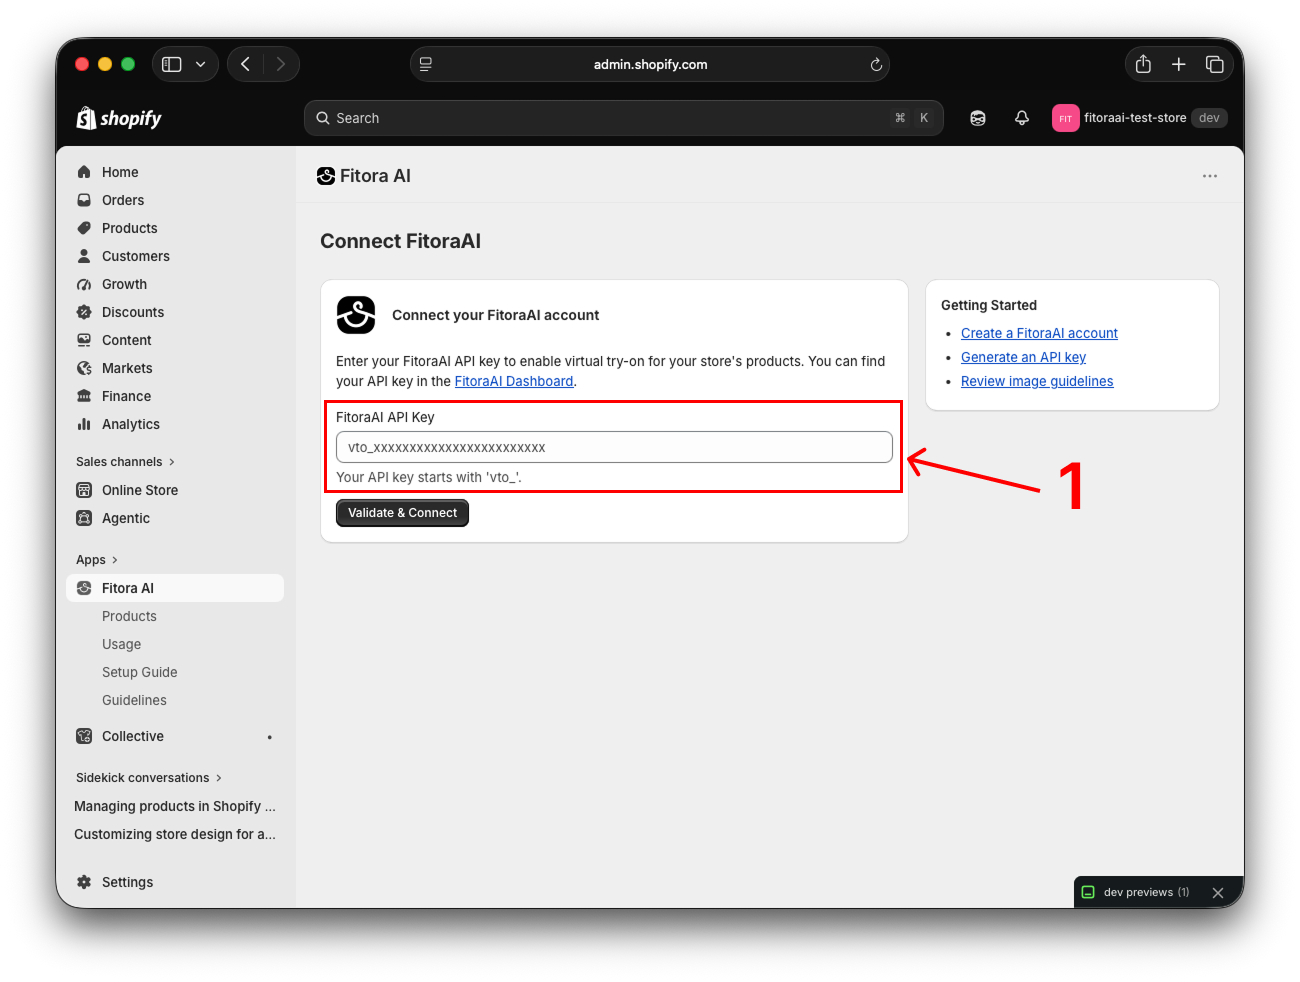
Look for: The connection status to change to Connected once verified.
Step 03
Configure Products
Fitora AI needs to know what type of garment each product is. You can configure Try-On settings per product directly in the app.
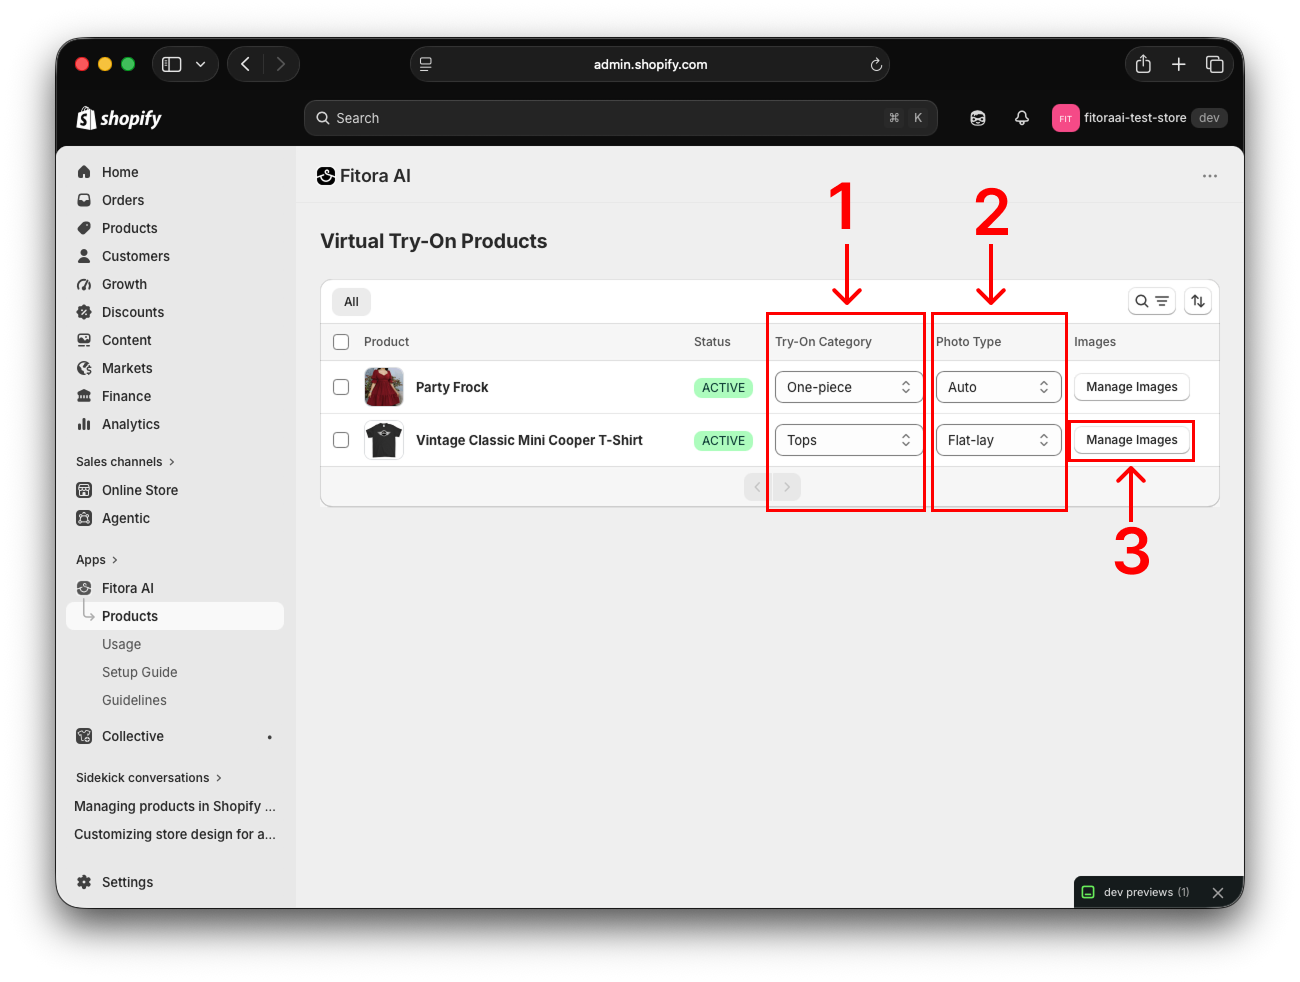
Look for: Try-On Category (Tops, Bottoms, or One-piece) and Photo Type (Auto, Flat-lay, Model).
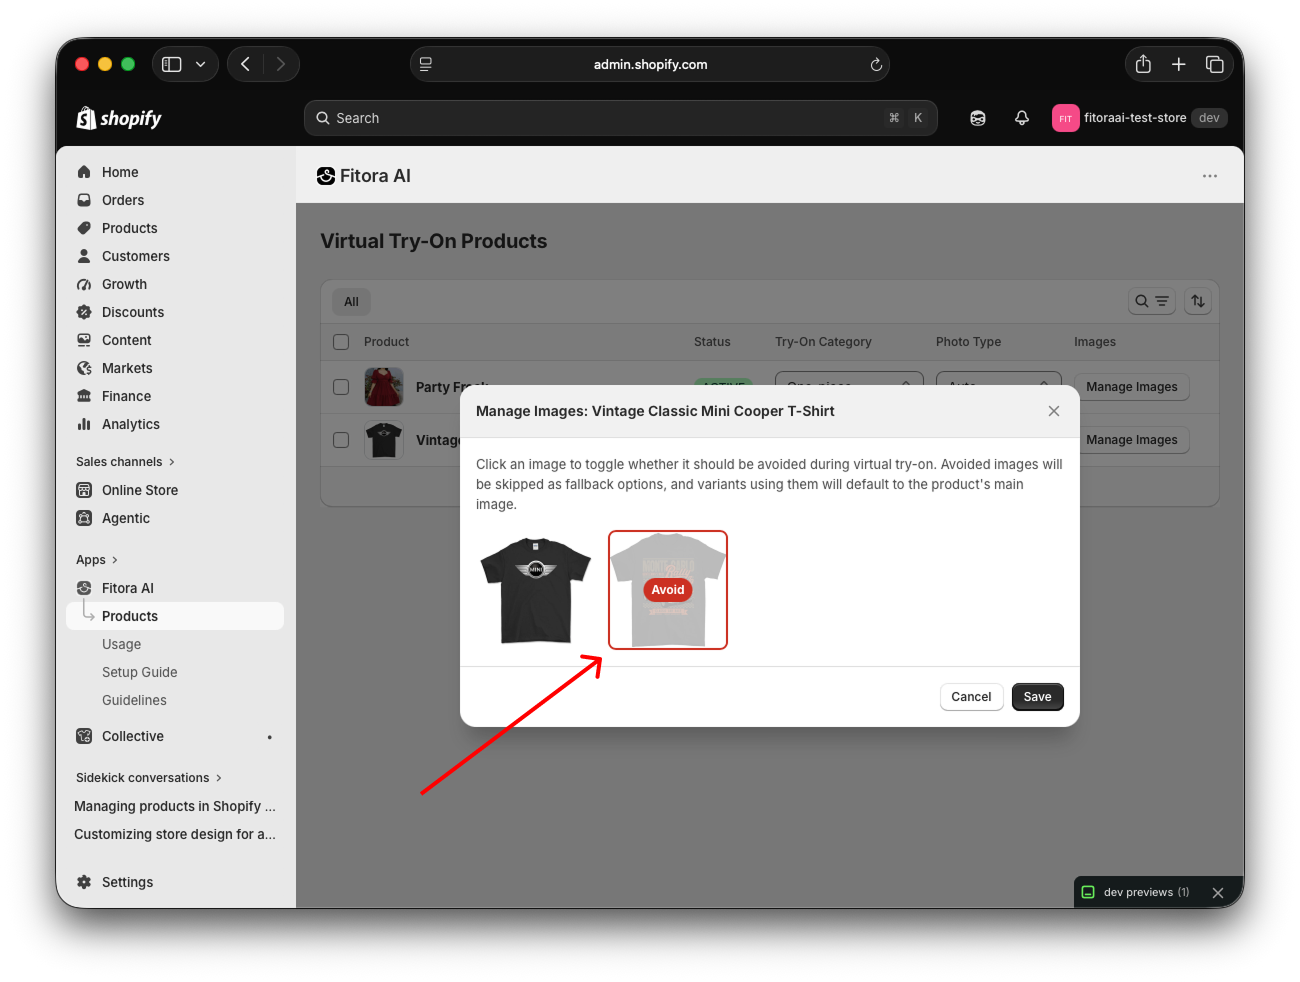
Look for: The Manage Images option to hide lifestyle or close-up shots from the virtual try-on flow.
Step 04
Enable Try-On in Theme
Fitora AI uses a Theme App Extension to safely integrate into your storefront. Add the Try-On button via your Shopify Theme Editor.
1. Open the Theme Editor
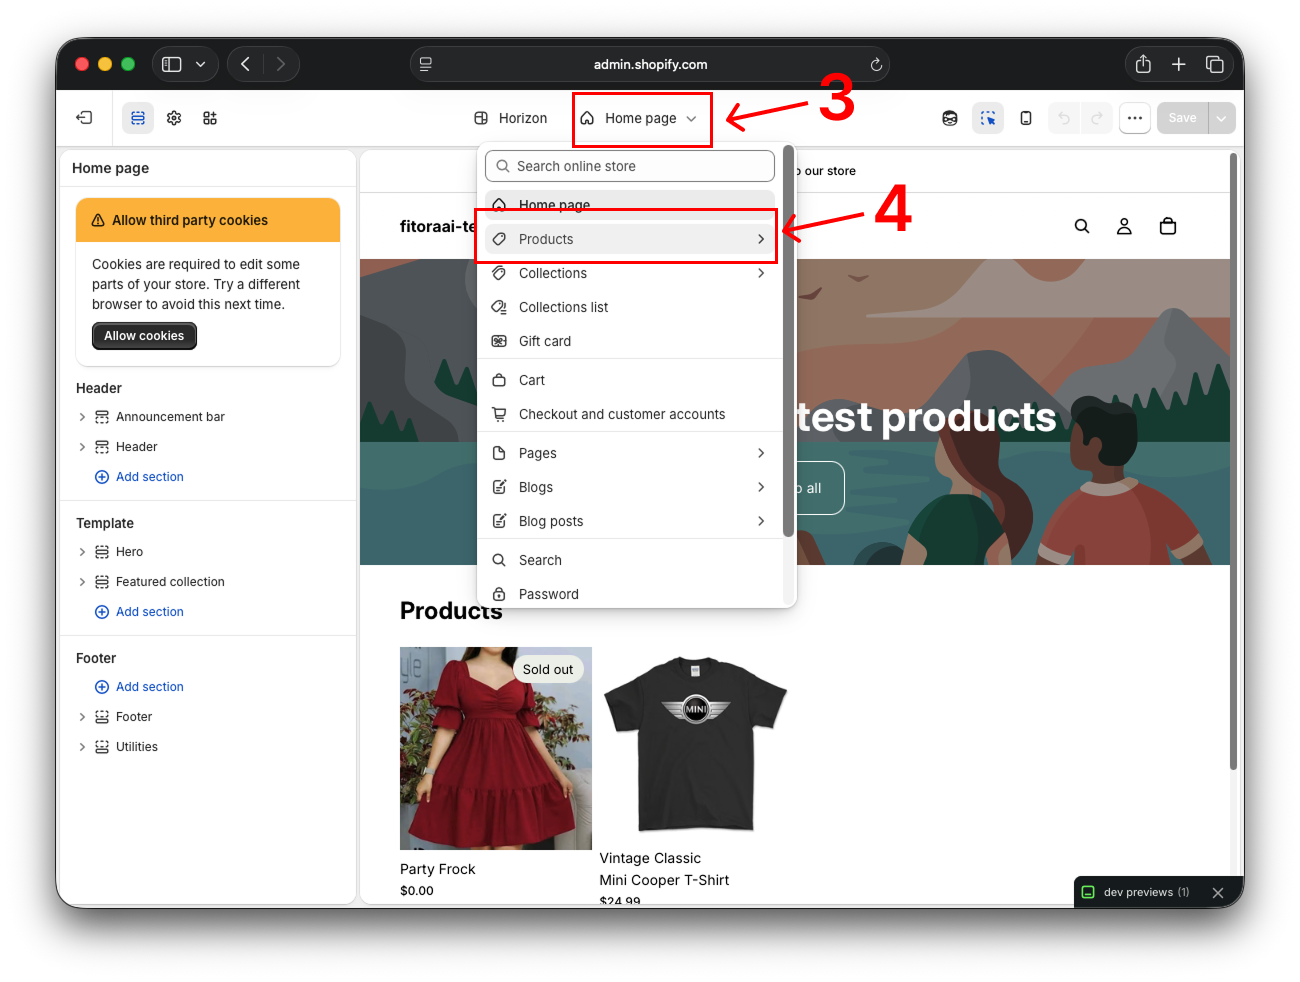
Look for: Customize under Sales Channels → Online Store → Themes.
2. Add the App Block to your Product Page
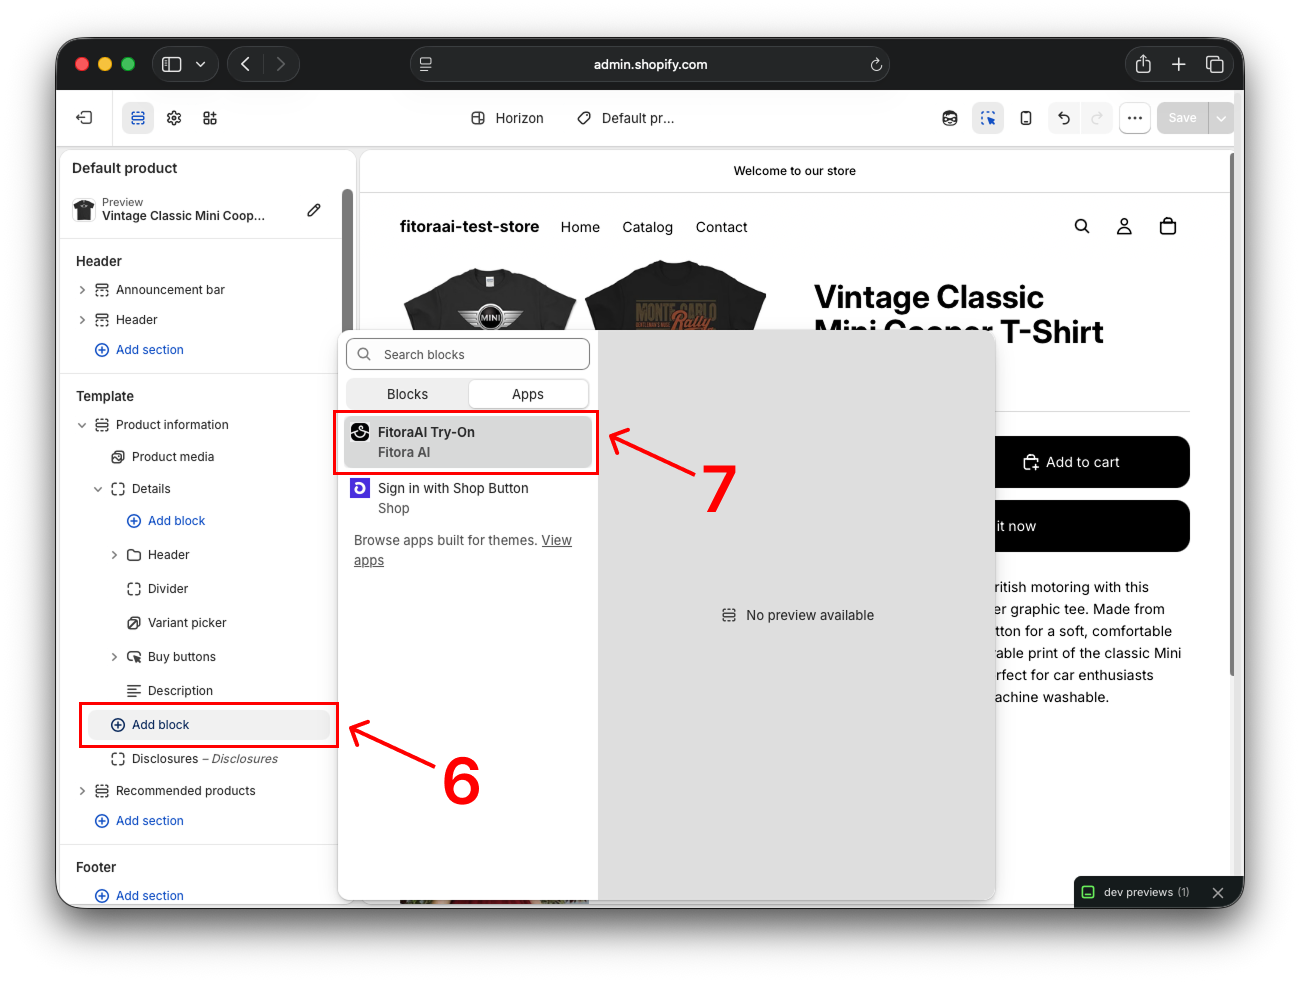
Look for: Navigate to the Default product page, click Add block, switch to the Apps tab, and select FitoraAI Try-On.
Step 05
Save & Publish
Position the Try-On button where it fits best (usually near the Add to Cart button), then save your theme to make it live.
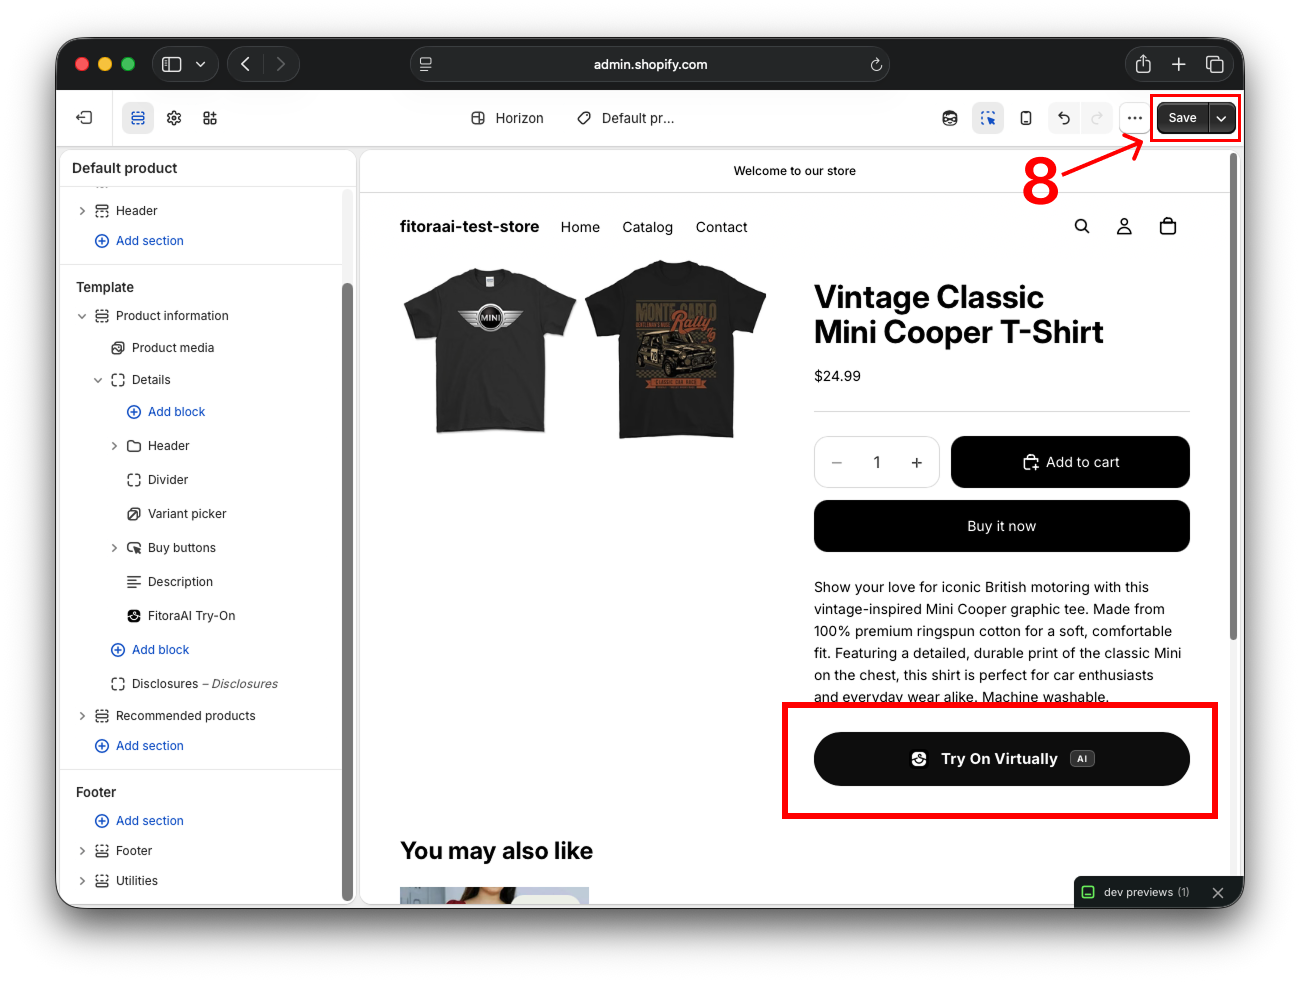
Look for: The Save button at the top right of the Theme Editor.
Step 06
Verify Setup
Run through this final checklist to ensure everything is configured properly.
- API key created and connected to Shopify
- Product Try-On Category configured (not OFF)
- Fitora AI Try-On button added to the product page
- Button is visible on the live storefront
- Available credits in Fitora AI dashboard
Troubleshooting
API key not connecting
Ensure there are no spaces when pasting the key. Your key should begin with vto_.
Try-On Button not visible
Make sure you clicked Save in the Theme Editor, and that the product you're viewing has a Try-On category assigned (Tops, Bottoms, or One-piece) in the Fitora app.
Try-On returning errors
Check if you have remaining credits on the Fitora AI Home dashboard.
You're Ready
Your customers can now upload their photo and instantly visualize themselves in your clothing.
Open Shopify Admin